You've connected your WhatsApp number to Scale2Mint.
Now it's time to send your first campaign. This tutorial walks you through every step — from uploading your contacts to watching your first messages deliver in real time.
Time to complete: 15–20 minutes on your first campaign. Under 5 minutes once you've done it once.
Before you start
Make sure you have:
- An active WhatsApp number connected to Scale2Mint
- A CSV file of your contacts (name, phone number, any custom fields)
- An idea of what message you want to send
Info
Your WhatsApp number must be verified and active before you can send campaigns. If you haven't connected your number yet, go to Settings → Numbers and follow the setup flow first.
Step 1 — Upload your contacts
Upload your contacts via CSV
Go to Contacts in the left sidebar, then click Import CSV in the top right.
Your CSV needs at minimum a phone_number column. Any additional columns (name, email, city, order value — whatever you have) are automatically detected as custom fields.
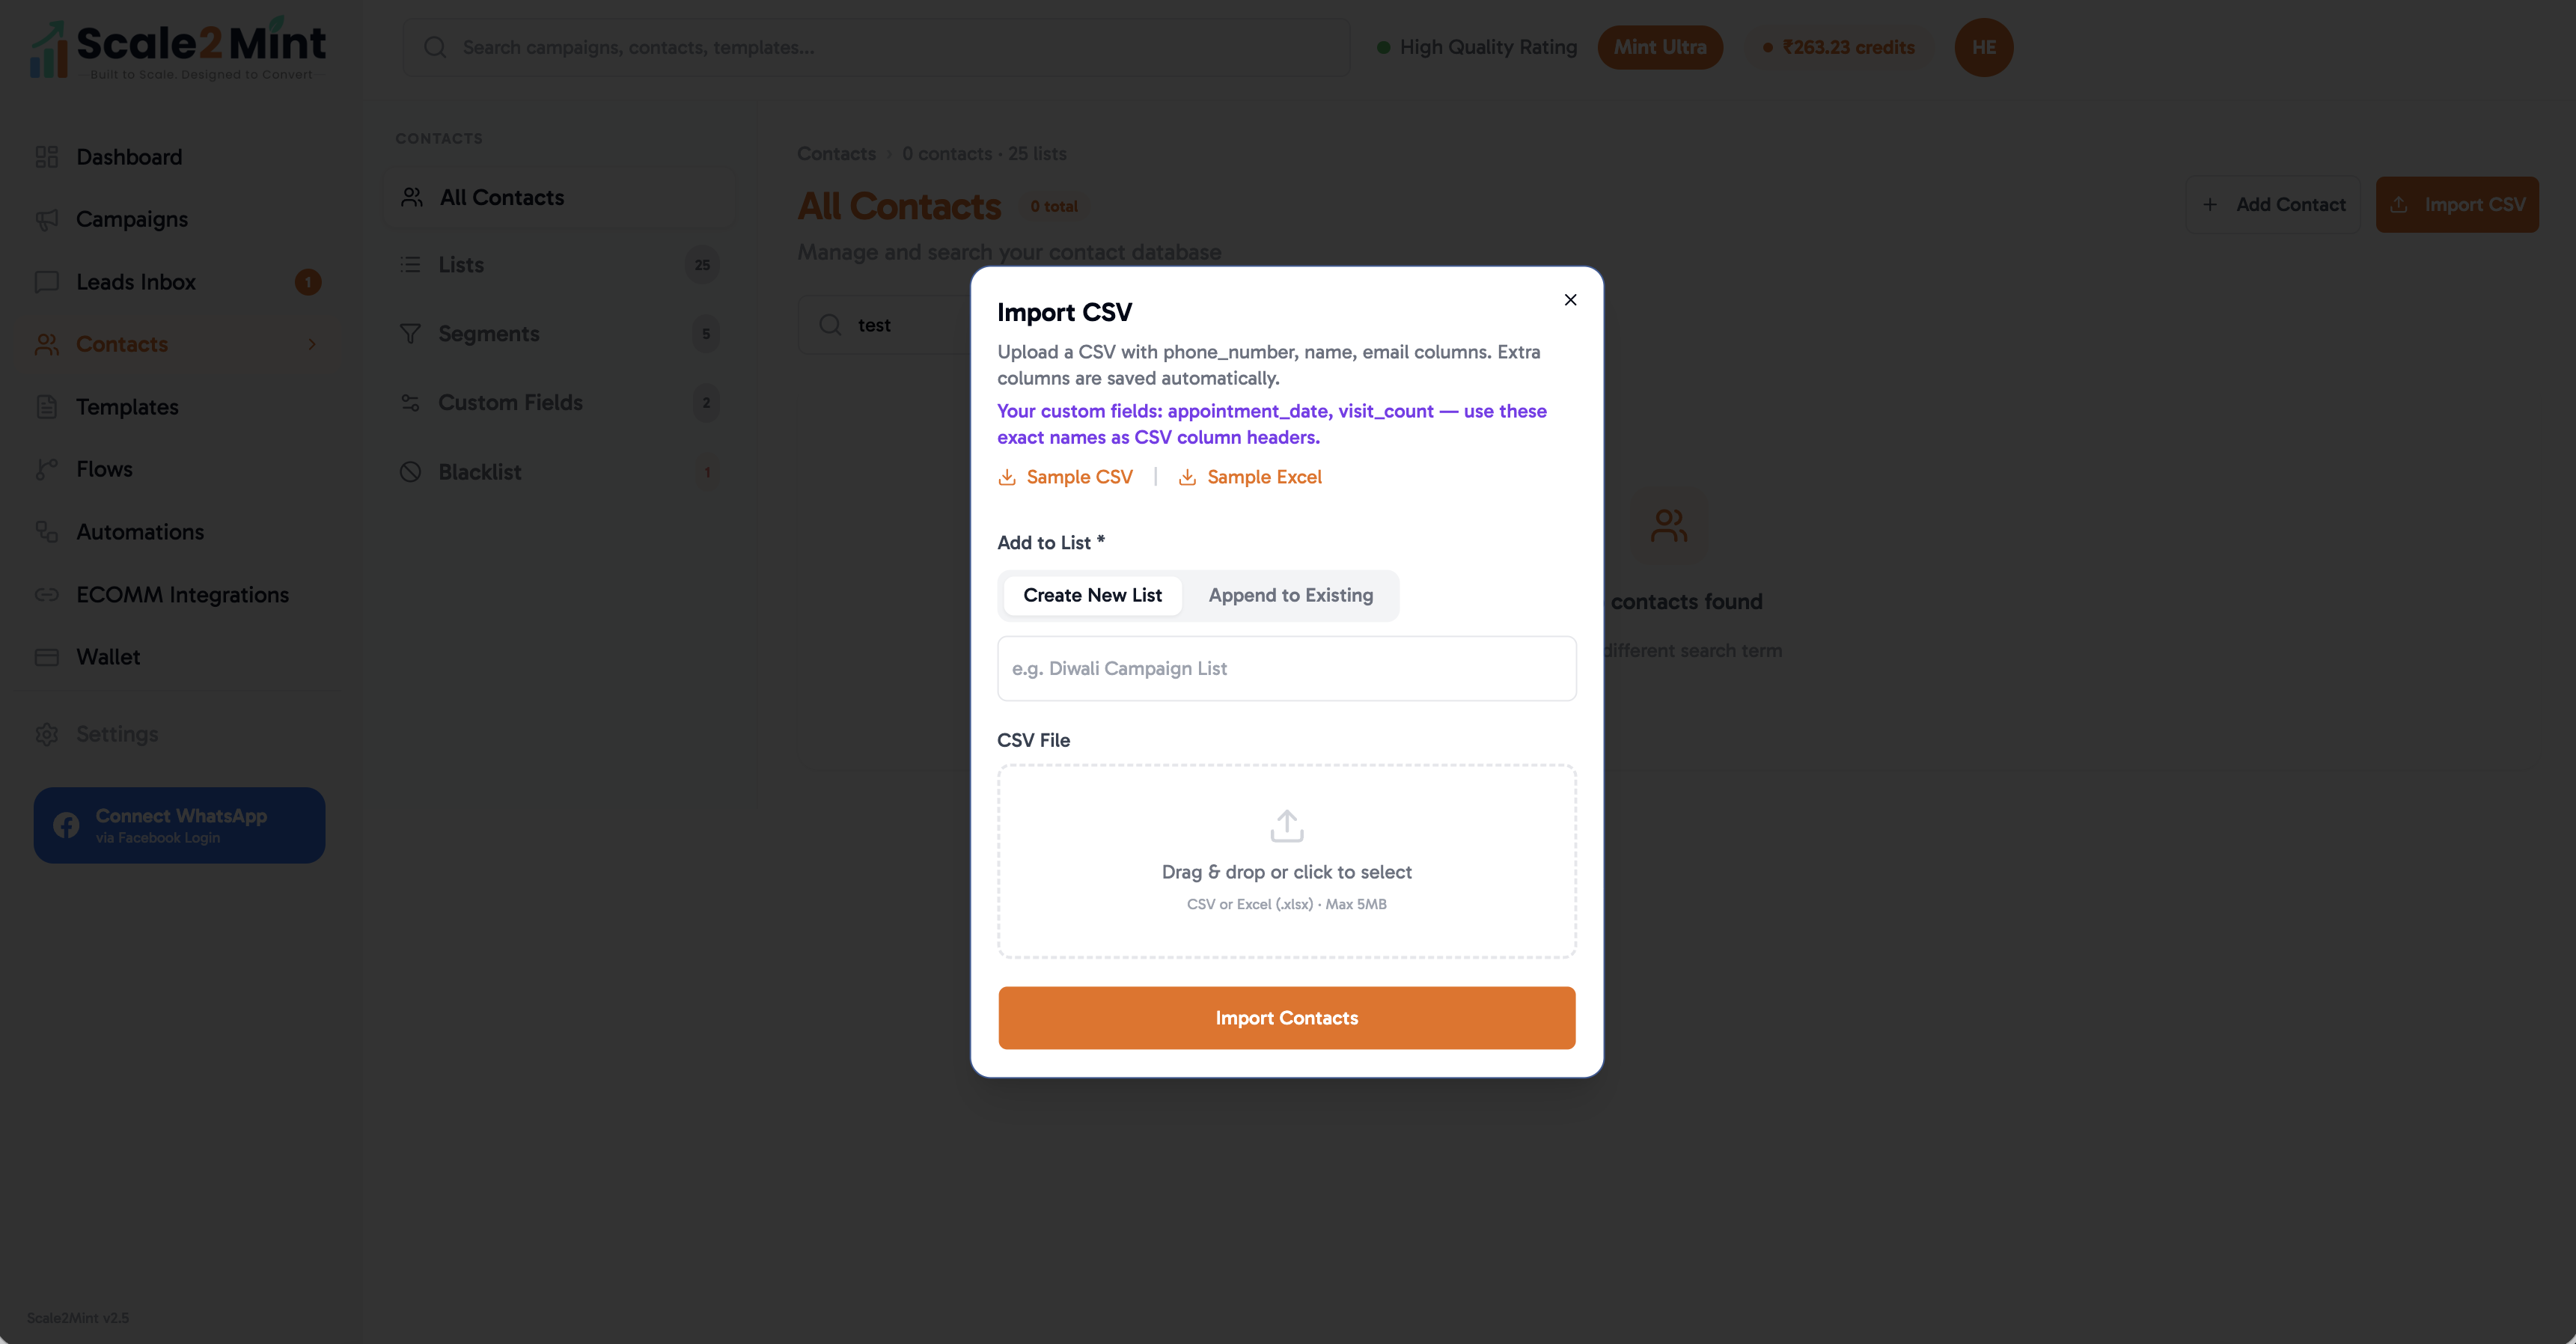
Scale2Mint automatically deduplicates by phone number, so if a contact already exists it won't create a duplicate. Once uploaded, your contacts appear in the list immediately.
Tip
CSV format tip: Phone numbers should include the country code without the + sign. For Indian numbers: 919876543210 not +91 98765 43210. Scale2Mint will normalise most formats automatically, but this is the safest input format.
Step 2 — Create a WhatsApp template
Create a message template
Go to Templates in the sidebar and click New Template.
Give your template a name (used internally only — customers never see this), select a category, and write your message body. Use {{1}}, {{2}} etc. as placeholders for dynamic content like the customer's name or order number.
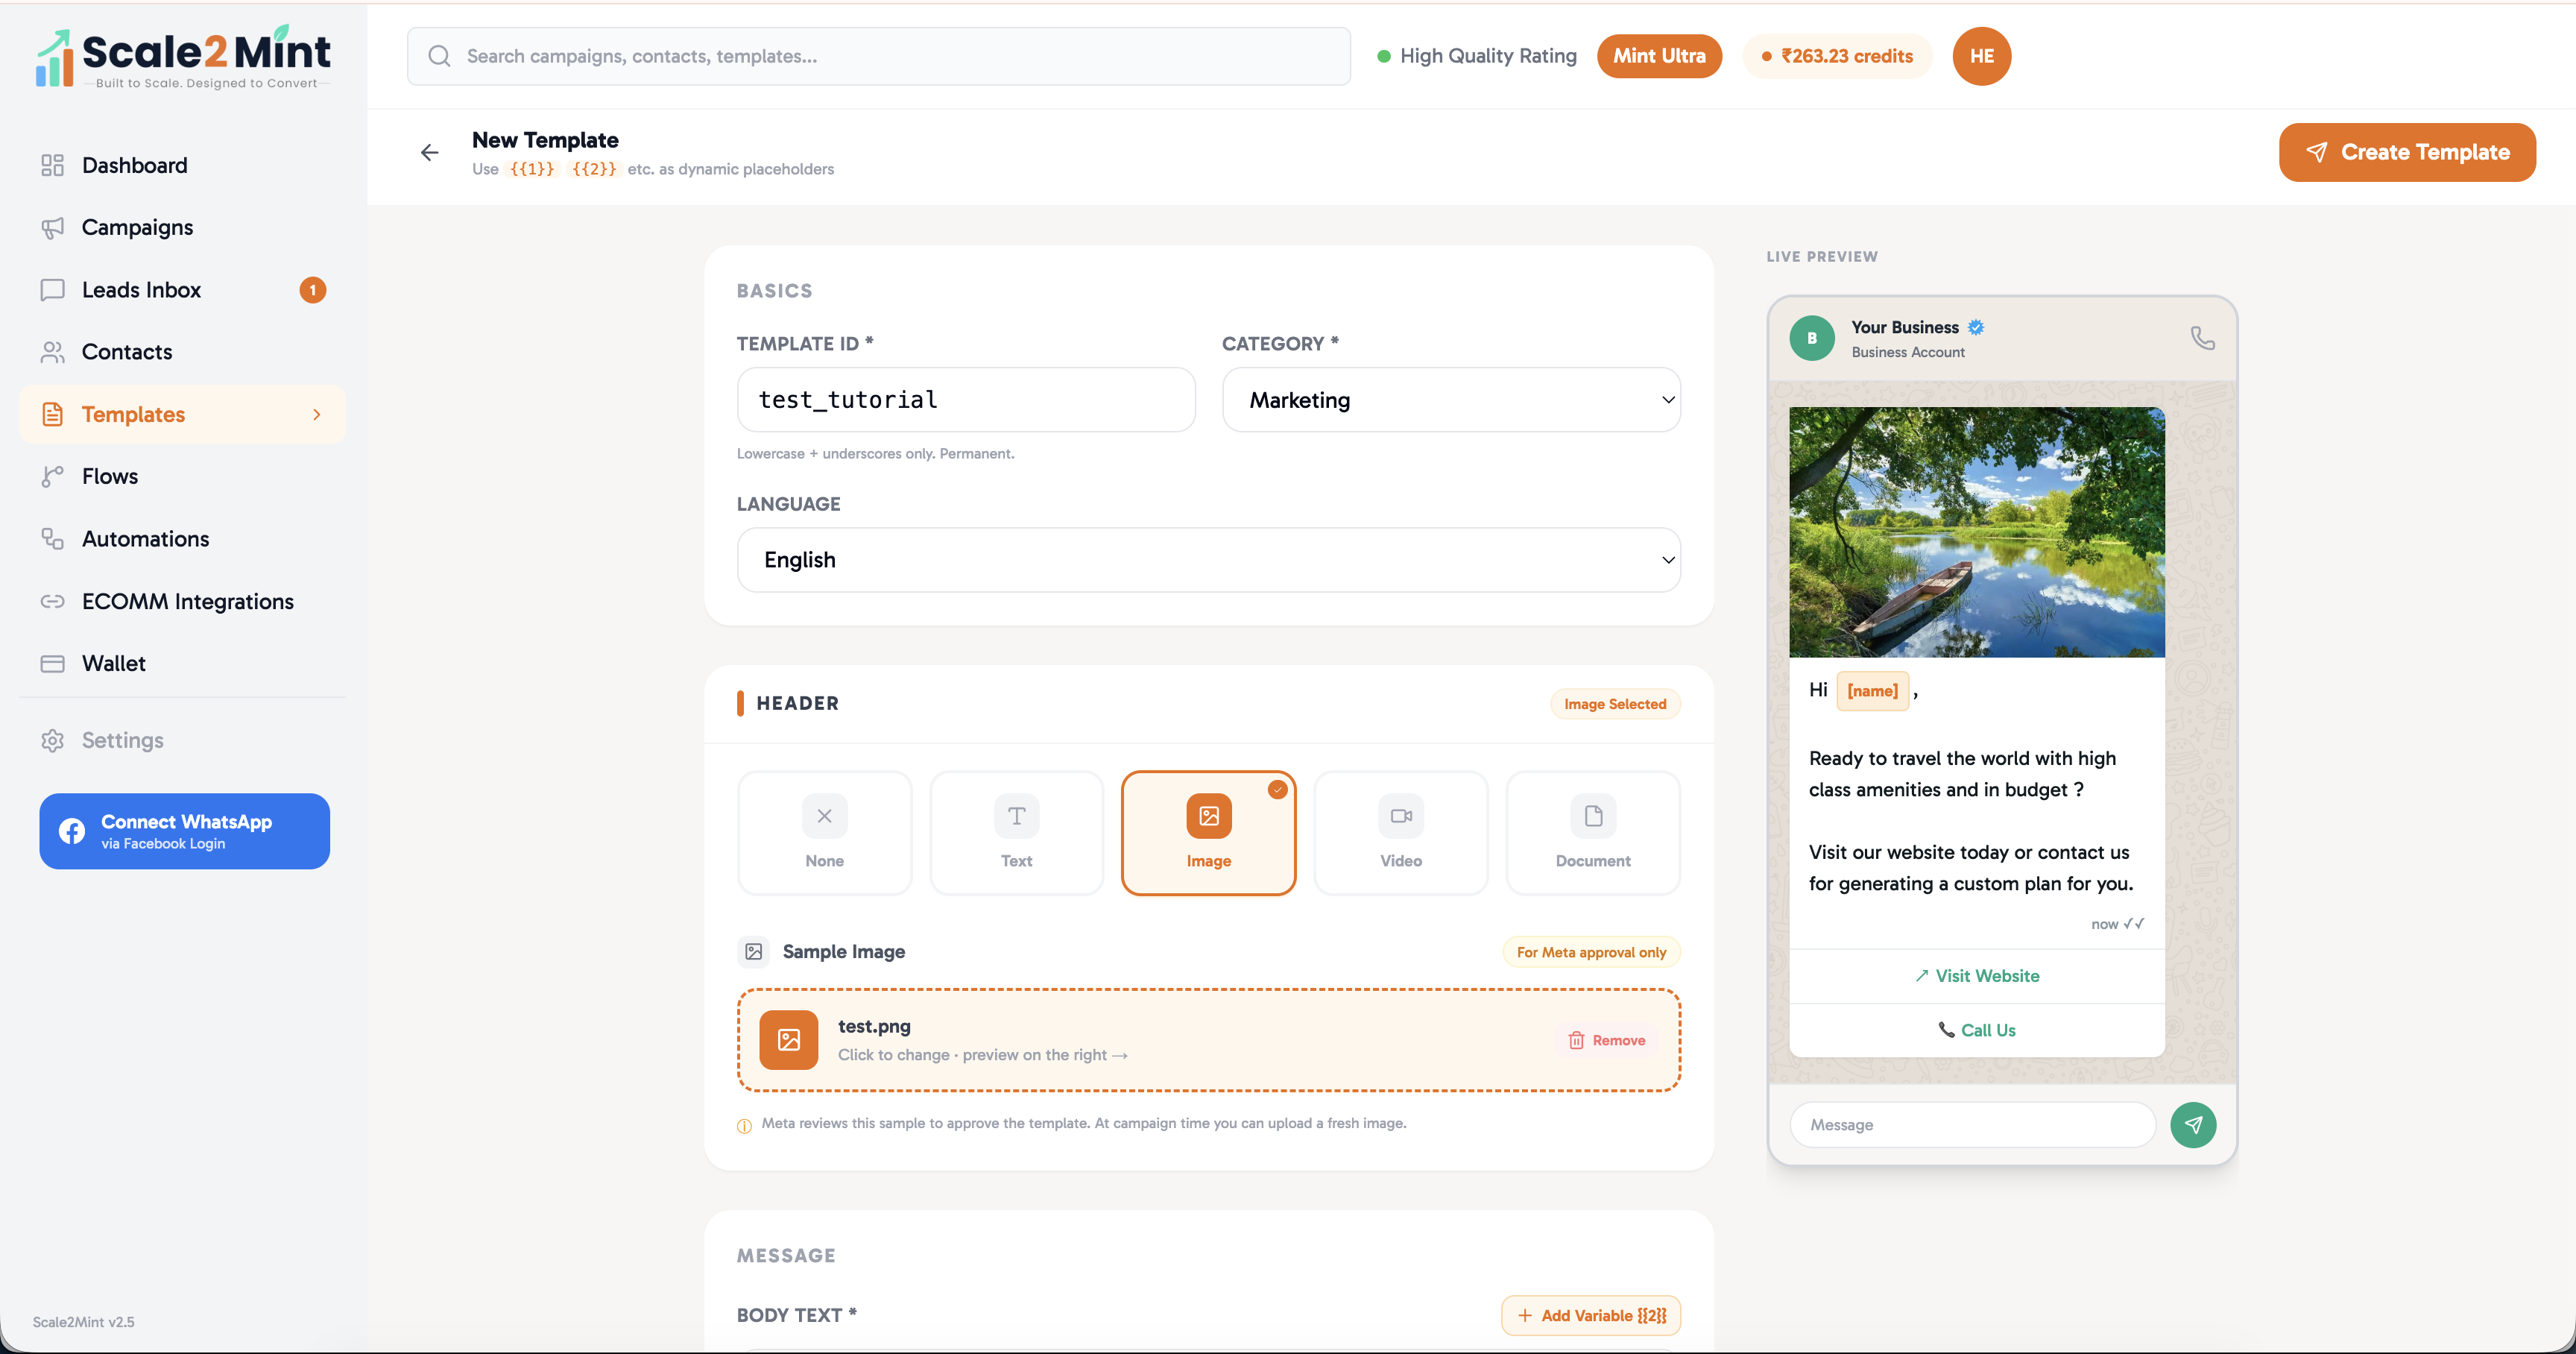
The preview panel on the right shows exactly how your message will look in WhatsApp. You can also add a header (text or image), footer, and quick reply buttons.
Tip
Which category to pick? Use Marketing for promotional messages — sales, offers, announcements. Use Utility for transactional messages — order confirmations, shipping updates, reminders. Utility messages cost less per conversation and have higher delivery rates.
Step 3 — Wait for Meta approval
Submit and wait for Meta approval
Click Submit for Approval. Scale2Mint sends your template directly to Meta for review.
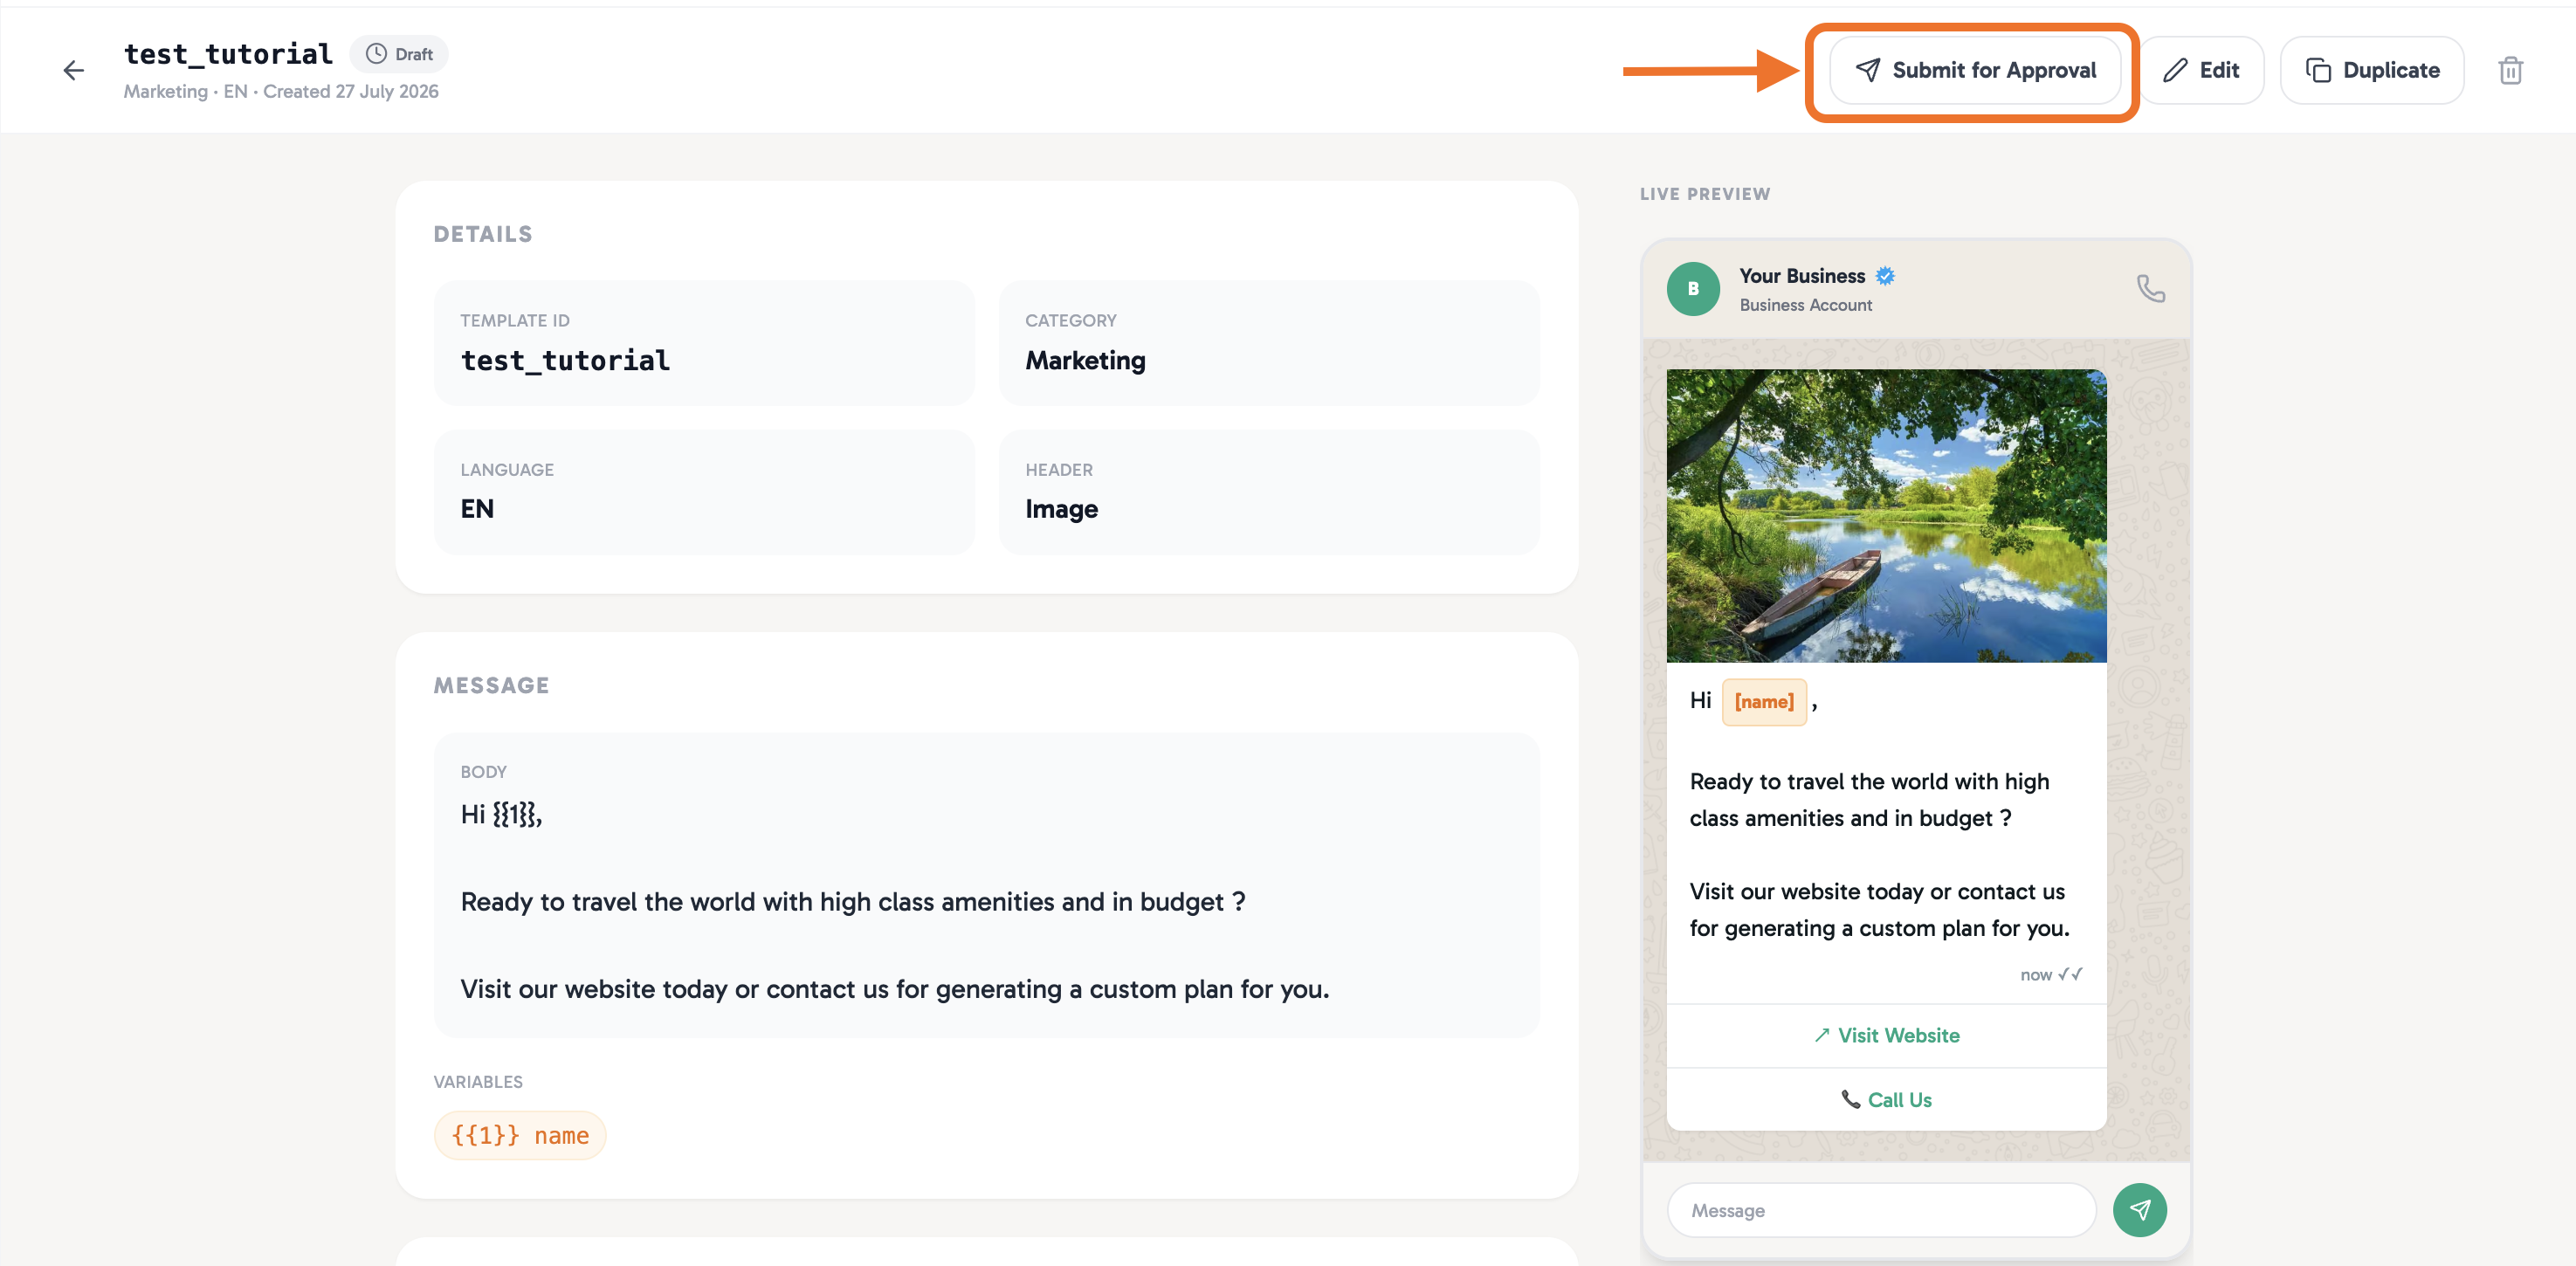
Meta typically approves templates within a few minutes to a few hours. You'll see the status change from Pending to Approved in your Templates list. You'll also get a notification when it's ready.

Note
If your template is rejected, Meta will show a rejection reason. The most common reasons are: promotional language in a Utility template, missing opt-out language, or disallowed content. Fix the issue and resubmit — rejections don't affect your account standing.
Step 4 — Create a new campaign
Create a new campaign
Go to Campaigns in the sidebar and click New Campaign in the top right.
Give your campaign a name — something descriptive that you'll recognise later (e.g. "July Sale — Delhi Customers" or "COD Confirmation — Batch 1").

Select the WhatsApp number you want to send from. If you have multiple numbers connected, pick the right one for this campaign — the customer will see this number's display name in their WhatsApp.
Step 5 — Select your audience
Select who receives this campaign
Choose your audience — either a Contact List you uploaded in Step 1, or a Smart Segment if you've set up dynamic filters.

Scale2Mint shows you the contact count so you know exactly how many messages will go out. Opted-out contacts are automatically excluded — you never need to manage that manually.
Info
Lists vs Segments: A Contact List is a static group — the same contacts you uploaded. A Smart Segment is dynamic — it auto-updates based on rules you define (e.g. "contacts with city = Delhi and custom_field order_value > 1000"). Segments are available on Mint Prime and above.
Step 6 — Select template and map variables
Select your approved template and map variables
Select the template you created in Step 2. Once selected, Scale2Mint shows you all the variable placeholders ({{1}}, {{2}} etc.) and asks you to map each one to a contact field or a fixed value.

For example: {{1}} → Contact Name, {{2}} → Fixed value "20%", {{3}} → Contact field "city".
Every contact will get a personalised message with their specific values filled in — no merge errors, no "[FIRST NAME]" disasters.
Tip
Use Preview to see how the message looks for a specific contact before sending. This catches mapping mistakes before they go to thousands of people.
Step 7 — Schedule or send now
Set your send time
Choose whether to Send Now or Schedule for later.

If scheduling, pick your date and time. Scale2Mint stores it in IST automatically. A good rule of thumb for Indian audiences: Tuesday–Thursday, 10AM–12PM or 5PM–7PM consistently outperform other slots for marketing messages.
Click Launch Campaign (or Schedule). That's it — your campaign is queued.
Tip
Messages per minute: Scale2Mint sends at 120 messages per minute by default — fast enough for most campaigns without risking Meta's rate limits. For very large lists (10,000+), keep this at the default and let it run.
Step 8 — Watch it run
Track delivery in real time
Go to your campaign detail page. You'll see the stats update live as messages go out — Sent, Delivered, Read, and Failed counters all update in real time as Meta sends back delivery receipts.

What the statuses mean:
- Sent — handed to Meta successfully
- Delivered — arrived on the customer's device
- Read — customer opened the message (two blue ticks)
- Failed — not delivered (usually Meta's frequency cap — the customer received too many marketing messages that day)
If you have failed messages after the campaign completes, you can retry them from this same screen.
What's next?
Your first campaign is live. Here's what to do next:
- Set up a follow-up — go back to the campaign and click "Add Follow-up" to automatically re-engage contacts who received but didn't read your message
- Create a segment — instead of sending to all contacts next time, create a smart segment based on behaviour or custom fields
- Build an automation flow — set up Shopify triggers so order confirmations go out automatically without you creating a campaign manually